

Communication with Middleware uses a TCP connection. To be able to establish the connection it is necessary to:
All TCP connections need a Server which awaits a connection request in a pre-established port and a client that, at the right time, will establish the connection to such server. cLAN equipment work as TCP clients, so we must have a Server (MW-XF) to wait for the connection request. We now explain how to configure the cLAN to establish communication with the Middleware. We enter the MW-XF menu and configure the following parameters:
|
If connect the cLAN to Exemys Telemetry Server the GRD ID, GRD Password, IP/URL and Port will be provided by Exemys. |
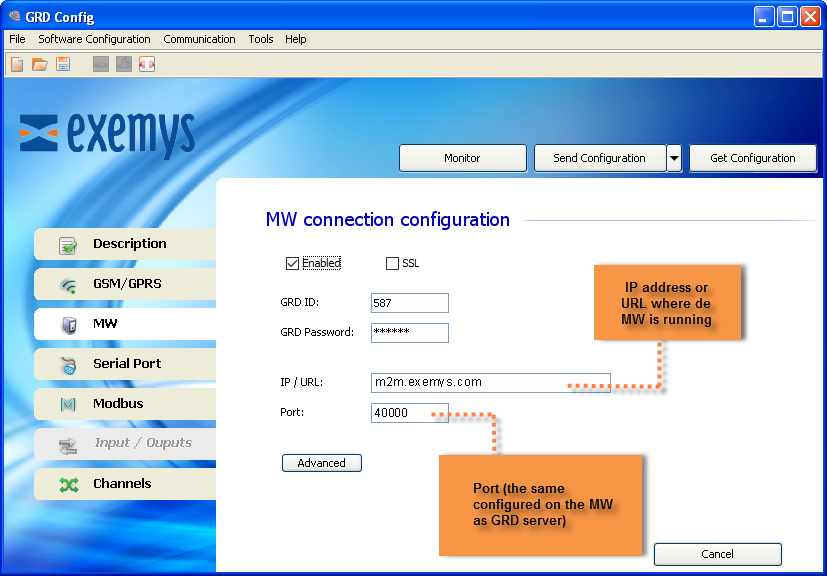
When this option is enabled, we tell the cLAN-XF to establish connection with the specified configuration. If this option is disabled the cLAN-XF will not establish connections.
If you are using a cLAN-XF with firmware 3.2 higher, you will be also be able to enable SSL encryption for the link between the cLAN-XF and the MW.
If you use SSL mode please read the SSL certificate creation and installation appendix. |
The IP address or URL of the server where the MW-XF running must be entered here. The cLAN-XF can resolve URLs using DNS.
The server port must be entered in this field.
The cLAN-XF must be connected to a MW-XF, this is why it is absolutely necessary to place an ID number to identify the cLAN-XF at the moment of connection and with a password if necessary.
If the cLAN-XF must establish a connection with the Middleware (MW-XF), it has to be identified in order for the MW-XF allows to remain connected. The ID is part of this identification. If the MW-XF has not configured such an ID as valid, it will close the connection with the cLAN-XF, this is a number from 1 to 4000 and it must be unique.
The cLAN-XF equipment has a password for authentication with the MW-XF, therefore, at the moment of connection the password is verified against the MW-XF password, if there is a coincidence, the connection is accepted. The password should have a maximum length of 8 characters.
This password will be prompted everytime you try to configure the cLAN-XF locally (LAN/Ethernet)
|
Remember this password to be able to configure the cLAN-XF locally |
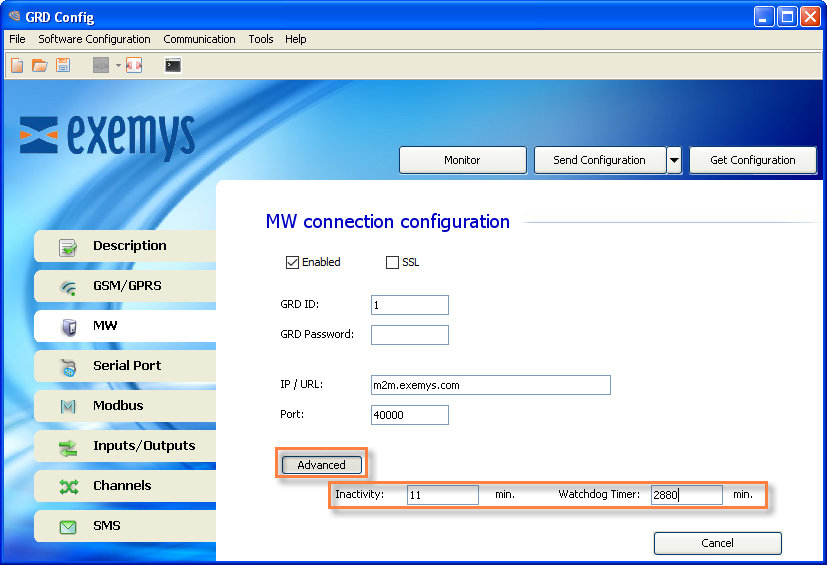
This is the time the cLAN-XF takes to decide that the connection with the MW-XF has been closed.
This parameter defines how long will wait the cLAN to reboot if it can't establish a connection to the MW.
If connect the cLAN-XF to Exemys Telemetry Server you don't need to read this section |
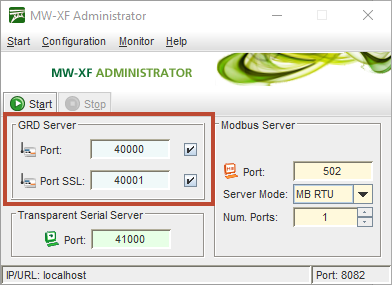
The port in the MW-XF must have the same configuration as the one in the cLAN-XF, that is the TCP port through which the “GRD server“ connections are received. This port must be ready to receive connections, which means that it should not be blocked by any type of firewall or router.
Since MW 6.0.0 incomming SSL connections are allowed from cLAN-XF with firmware 3.2+
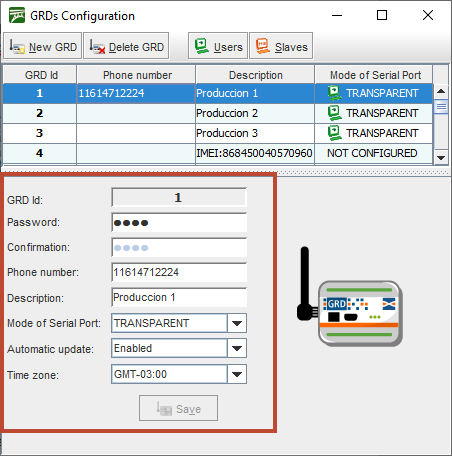
We first create a cLAN-XF with the same ID as the one loaded previously in the equipment, this is done from “Configuration -> GRDs” click on “New GRD”.
The password must be entered if there is one previously loaded in the equipment, otherwise, it should be kept blank.
The “Telephone” and “Description” parameters are optional, these help the user with the identification of the device using that ID.
As to the "Serial port mode” we select as an example “Not Configured”, this refers to the mode of operation of the cLAN-XF serial port, in this case it will not be used.
The 2 operational modes will be detailed later, as at the moment we just want to establish the connection between the cLAN-XF and the MW.
|
With this, the cLAN-XF is added so the connection can be established. We end the basic configuration in the MW-XF. |
To verify whether the entered configuration into the cLAN-XF is the correct one we have the possibility of monitoring the status of the connection.
To access the monitoring screen of the configurator click on the “Monitor” button. Then, the following screen will be displayed:
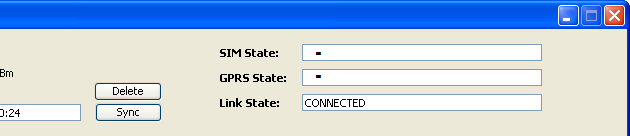
The TCP connection state can also be monitored. The possible TCP connection states are:
cLAN-XF and GRD-XF devices connected to the MW-XF can be monitored, this can be done by accessing “Monitor -> GRDs Connected” , a list will be displayed showing all GRD/cLAN added to the MW ordered by ID, and showing if it is connected and if it is so it will show its IP.

Statistics are made based on the quantity of information received and transmitted. The information given by these statistics differ according to how the cLAN/GRD type was defined.
To have access to statistics of each cLAN/GRD the button located in the statistics column must be pressed.
When the cLAN/GRD shows the serial port mode as “NOT CONFIGURED”, we will not be able to access the statistics.
The Modbus statistics screen is shown below:
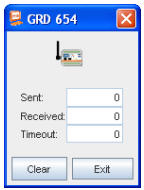
When the cLAN/GRD is connected the windows is displayed as enabled, on the contrary if the device is disconnected the Windows is shown in grey as disabled.
The window shows the number of packets sent to the device and received from it, those queries sent that are unanswered are part of the Timeout count.
The erase button resets the counters to zero.
The transparent mode statistics screen is shown below.
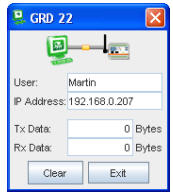
When the cLAN/GRD is connected and a user is connected to the MW pointing to that device, the screen will be shown as enabled.
In the statistics of the TR mode we can find the name of the user and the IP to which he is connecting, as well as the number of bytes transmitted to the serial port of the device and bytes received from it.
The erase button resets again the counters to zero.
2022-03-18