

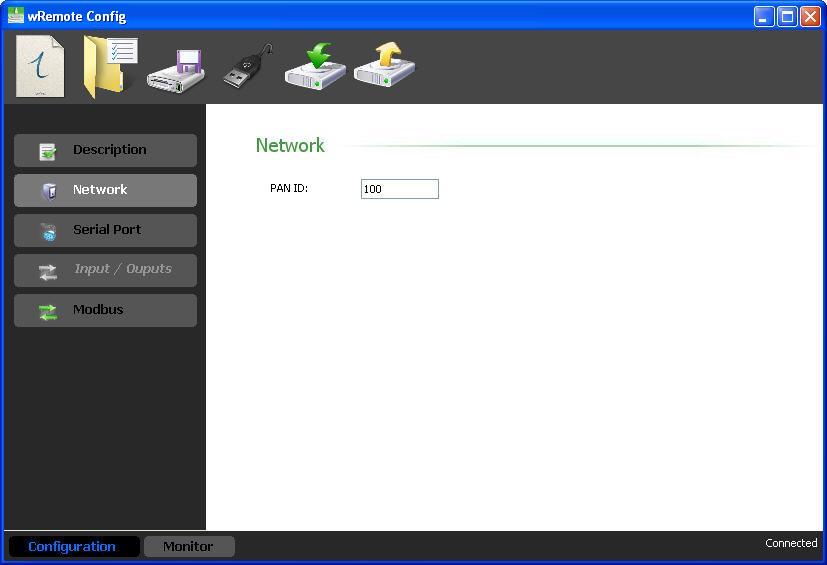
The assistant to form the network is the concentrator, if you connect to “wRemote Config” and read the configuration and go to the tab “Network”, we will see a parameter called “PAN ID”. This number is between 1 and 65534 and is the number it will take to the network, the default value is 100; this means that if you boot the computer for the first time and did not configure it will also form a network with the number 100.
Once the “Concentrator” has formed the network, we will see that the LED link will stop flashing and stay lit.
Now see how to connect the “Nodes”:
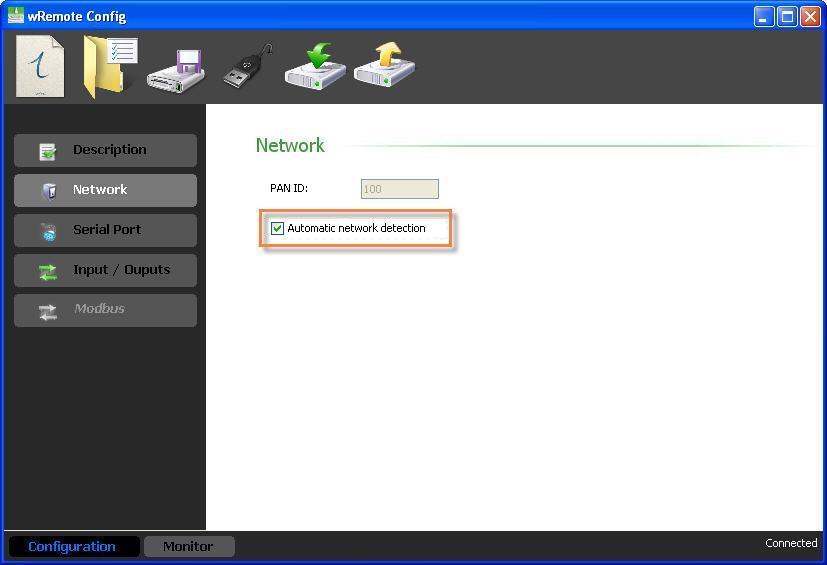
These have the option to automatically detect the network which is enabled on the same tab “Network”. This is the value that comes from the factory, so if we turn it on and there is a “Concentrator” that has formed a network; it will automatically connect and can also be manually configured.
Once you have connected the “Nodes”, you will be able to link them to the “Concentrator”.
Then we will see an example from the beginning of how to form a network and link “Nodes” devices to a “Concentrator”
We suppose the following devices:
Serial Number : 125
Serial Number : 126
Serial Number : 124
All the devices have factory settings
First turn on the equipment, then connect the “Concentrator” to a PC via USB and open the “wRemote Config”. Read the parameters and decide whether to leave the “PAN ID” at 100 or place another, in this case we leave it at 100 and we hope that it will form a network, remember that this happens when the “Link” LED keeps flashing.
Once the network is formed the “Nodes” will connect to the same network because they are set to auto detect. We will realize this because the slow blinking “Link” LED will begin to blink rapidly.
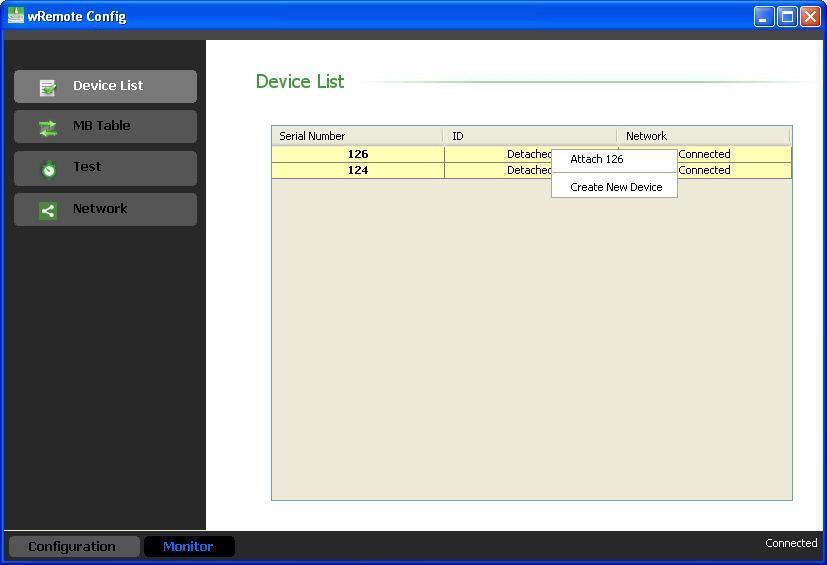
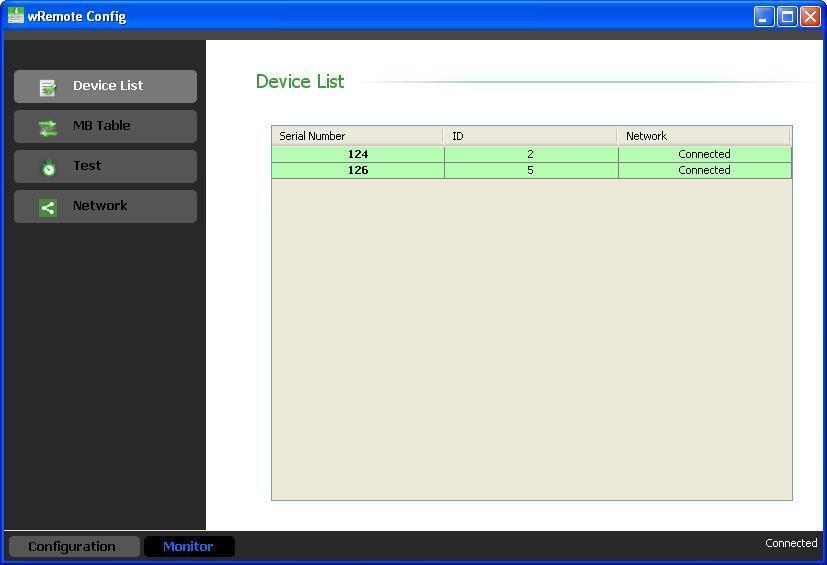
In the “wRemote Config” that is connected to the “Concentrator”, we go to the “Monitoring” and “Device List” screen, if the “Nodes” are already connected we will see something like this:

As we can see in this table the 2 “Nodes” in yellow with “Detached” in the “ID” parameter and “Connected” in the “Network” parameter, means that they are connected but not linked to the “concentrator”. The relationship implies that the “Nodes” began sending parameters to the “Concentrator” and when it is turned off and turned back on it will connect to the new “PAN ID” because auto detection is disabled. Otherwise they only connect without transmitting your data and if you go out and come back on they search for a new network automatically.
To link you must click the right mouse button on the one you want and will see the option to “Attach ***” where *** is the serial number of the equipment. We click and it will open a window where you can select the “ID” number for that “Node”.
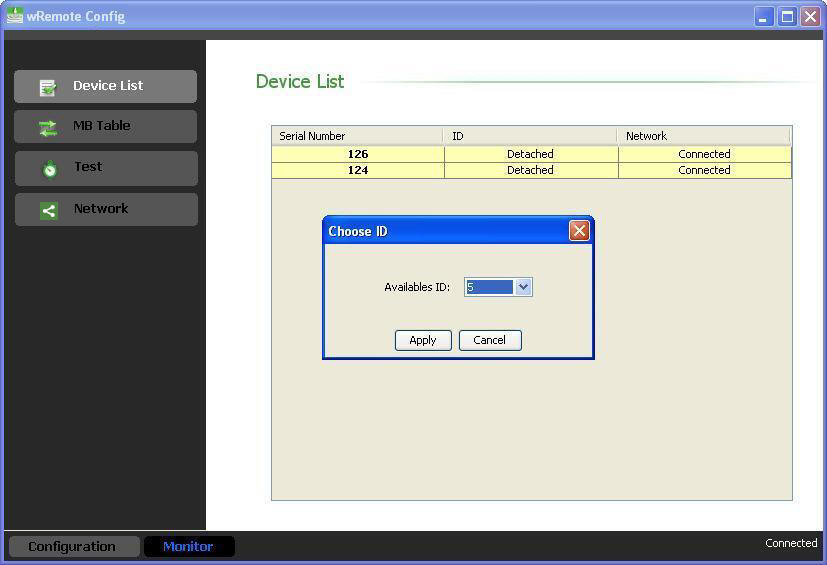
We link the two “Nodes” and see that the parameter “ID” changes in “Detached” and select the number you designated in green. In this case the, select the ID = 2 for serial number 124 and ID = 5 for 126.
In the “Nodes” we can see that the “Link” LED stop flashing quickly and stay lit indicating linkage.
|
It is important to note that to link the “Nodes” they will fix their “PAN ID” meaning network autodetection will be disabled. If for some reason you change the “PAN ID” of the “Concentrator” and want the “Nodes” to connect to it again, we will have to change their “PAN ID” locally or press the “Reset” switch. The “Reset” switch releases the “Node” device and places it back in autodetect mode. |
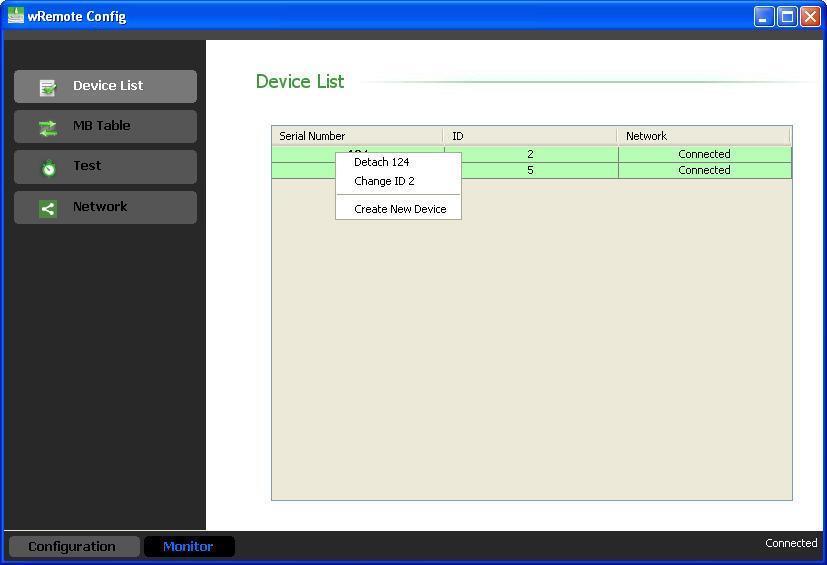
Once linked, we can unlink in the same way that we linked, by clicking the right mouse button on the one that we want, but now selecting “Detach ***” or rename the “ID” with the “Change ID”.
|
It is important to note that we can also link a “Node” before it is connected with the “Create New Device”, but all we need to know is the machine’s serial number and assign it an ID. |
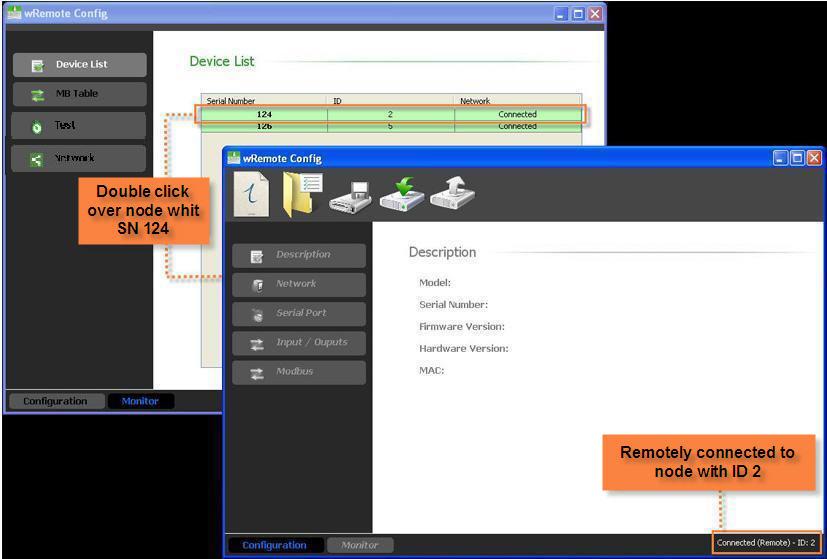
If you double click on a “Node” that is connected, we enter the setup remotely. Doing so will open another window “wRemote Config” as if it was connected locally giving us access to all parameters.
|
When we disassociate one “Node” from the “PAN ID” that was configured and re-enabled into automatic network detection, this means that it will connect to the nearest network, which may or may not be the same network it was connected with. |
Once we have the “Nodes” equipment linked we can begin to use them in any mode of operation.
Suppose that we have 2 “Concentrators”, this means that they form 2 networks, for this to happen it is mandatory that we set the “PAN IDs” up different from one another.
Now we will have “Nodes” that we will want connected to one “Concentrator” and others connected the other “Concentrator”. In this case it is important to pay close attention to the “PAN IDs”; if the “Nodes” are configured for automatic detection then they were connected to the network with a stronger signal which may not be what we want. To resolve this dilemma continue with the following:
The method consists in turn to separate networks. This means we change the “Concentrator” and “Nodes” that we want connected and from the configuration of the “Concentrator”, to link them just reconnect it. We can do the same with the other network as well.
It is important to note that if we disassociate one “Node”, this will disconnect and reconnect but may not be to the same network if it detects another with a better signal.